Real-Time Object Detection with Flutter, TensorFlow Lite and Yolo -Part 1

Impressed on the Machine Learning demo using Google ML Kit shown on Flutter Live ’18, we explore the same with on‑device machine learning instead of cloud hosted.
Running the machine learning models on mobile devices is mostly resource demanding. So we have chosen TensorFlow as it has solved many of those constraints with its TensorFlow Lite version.
In that flutter demo, they have used ImageStream from flutter camera plugin and detected the object using Google ML Kit.
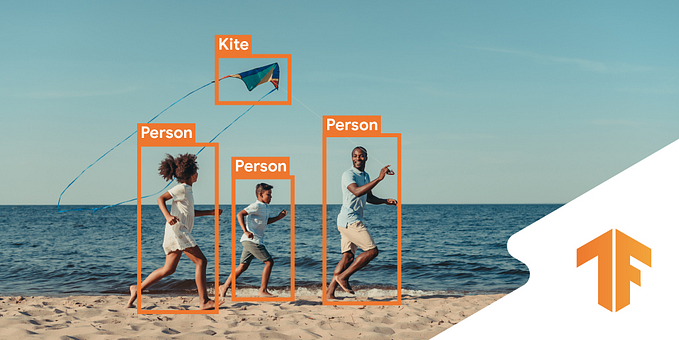
Here through this article, we are exploring the Image Streaming option with TensorFlow Lite and detect the object with YoloV2 Modal on Android.
Why TensorFlow Lite?
From its definitions,
TensorFlow Lite has a new mobile-optimized interpreter, which has the key goals of keeping apps lean and fast. The interpreter uses a static graph ordering and a custom (less-dynamic) memory allocator to ensure minimal load, initialization, and execution latency.
TensorFlow Lite provides an interface to leverage hardware acceleration, if available on the device. It does so via the Android Neural Networks API, available on Android 8.1 (API level 27) and higher.
Recently, they have even released developer preview version with GPU backend leverages for running compute-heavy machine learning models on mobile devices.
When I have started the exploration, I have noticed most of the examples were related used TensorFlow Mobile, the previous version which is depreciated now. TensorFlow Lite is actually an evolution of TensorFlow Mobile and it is the official solution for mobile and embedded devices.
Preparing Model
I have taken Tiny Yolo v2 model which is a very small model for constrained environments like mobile and converted it to Tensorflow Lite modal.
Yolo v2 uses Darknet-19 and to use the model with TensorFlow. We need to convert the modal from darknet format (.weights) to TensorFlow Protocol Buffers format.
Translating Yolo Modal for TensorFlow (.weights to .pb)
I have used darkflow to translate the darknet model to tensorflow. See here in for darkflow installation.
Here are the simple installation Steps and I have changed the offset value to 20 in loader.py before installation
pip install Cython
git clone https://github.com/thtrieu/darkflow.git
cd darkflowsed -i -e 's/self.offset = 16/self.offset = 20/g' darkflow/utils/loader.pypython3 setup.py build_ext --inplace
pip install .
I move the downloaded Yolo weight to dark flow and convert them to .pb format.
curl https://pjreddie.com/media/files/yolov2-tiny.weights -o yolov2-tiny.weightscurl https://raw.githubusercontent.com/pjreddie/darknet/master/cfg/yolov2-tiny.cfg -o yolov2-tiny.cfgcurl https://raw.githubusercontent.com/pjreddie/darknet/master/data/coco.names -o label.txt
flow --model yolov2-tiny.cfg --load yolov2-tiny.weights --savepb

You will see two files under built_graph directory .pb file, a .meta file. his .meta file is a JSON dump of everything in the meta dictionary that contains information necessary for post-processing such as anchors and labels

Converting TensorFlow format (.pb) to TensorFlow Lite (.lite)
We can't use the tensorflow .pb with TensorFlow Lite as it use TensorFlowLite uses FlatBuffers format (.lite )while TensorFlow uses Protocol Buffers.
With TensorFlow Python installation, we get tflite_convert command line script to convert TensorFlow format (.pb) to the TFLite format (.lite).
pip install --upgrade "tensorflow==1.7.*"tflite_convert --help
The primary benefit of FlatBuffers comes from the fact that they can be memory-mapped, and used directly from disk without being loaded and parsed.
We need to define the input array size, I set to 1 x 416 x 416 x 3 based on yolo model input configuration (1 x width x height x channels). You can get all the meta information from the .meta json file.

tflite_convert \
  --graph_def_file=built_graph/yolov2-tiny.pb \
  --output_file=built_graph/yolov2_graph.lite \
  --input_format=TENSORFLOW_GRAPHDEF \
  --output_format=TFLITE \
  --input_shape=1,416,416,3 \
  --input_array=input \
  --output_array=output \
  --inference_type=FLOAT \
  --input_data_type=FLOAT
Now , the .lite file built_graph/yolo_graph.lite is ready to load and run in tensorflow lite.
Setup TensorFlow Lite Android for Flutter
Let's start with a new flutter project with java and swift as a language choice.
flutter create -i swift --org francium.tech --description 'A Real Time Object Detection App' object_detectorSetup flutter assets for modal file
Move the .lite(modal file) and .meta(modal info) to the flutter assets.
mkdir object_detector/assets
mv yolov2_graph.lite object_detector/assets/
mv yolov2-tiny.meta object_detector/assets/
On Flutter Side, Enable assets folder in flutter configuration.

On Android Side, The .lite file will be memory-mapped, and will not work when the file is compressed. Android Asset Packaging Tool will compress all the assets. We need to mention not to compress the .lite in the build.gradle inside android block.

Access Android code with Flutter Platform Channel
Using Flutter Platform Integration, we can write platform specific code and access them using channel binding. Look here for more details.
On Flutter Side, I have updated the main.dart file to access the platform method by passing the .lite file asset path and json meta data read from .meta file containing yolo configuration. Also appended post processing config like max result and confidence threshold to filter.
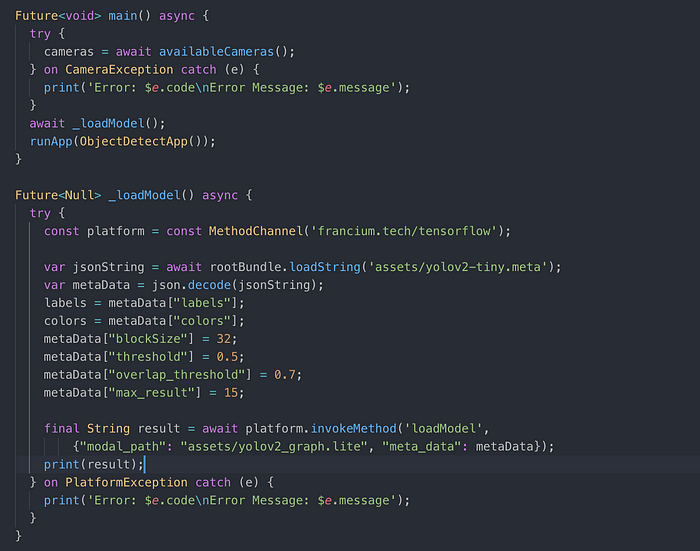
On Android Side, I have added a method binding (loadModal) with arguments as file path of the modal(.lite) and meta(.meta) file in MainActivity file.

For accessing the flutter assets files from android side, we need the lookup path for the platform side. We can get it using getLookupKeyForAsset method of FlutterView.

Initiate the TFLite Interpreter with modal file and metadata
On Android Side, Included the Tensorflow Lite AAR to the dependencies and run the gradle build.

Based on the TensorFlow Lite Android Example, I have done following things to setup TFLite Interpreter for running the modal,
- Read the modal file from the asset as ByteBuffer and initiated the
Interpreterwith it. - Based on meta data initiated the input and output buffer object to use it in modal run.
- Also, initialize other metadata required for post-processing the output data.
Here is the constructor method with initialization of above.

See here for main.dart , MainActivity.java and YoloDetector.java code
All set! Let's do flutter run.

Flutter and TFLite setup are done. Now we can run the tensorflow using the Image Stream provided by flutter camera plugin.
Image Streaming and Object Detection
From 0.28 version, Flutter Camera plugin has image streaming option that can be started from the controller.

The stream provides image data as CameraImage object which contains the bytes, height, width and image format information.
Enable Camera Plugin
Add the camera to flutter dependency,

Change the minimum Android SDK version to 21 (or higher) in your android/app/build.gradle file.

As of the current version (0.4.0+3) while writing this blog, for android the image date is in android.graphics.ImageFormat.YUV_420_888 format. But to detect the image with TensorFlow interpreter we need Bitmap pixel bytes.
Converting YUV_420_888 to Bitmap
Image conversion from YUV_420_888 format to RGB bitmap in dart or in Java is expensive. So, We go with RenderScript of android.
RenderScript is a framework for running computationally intensive tasks at high performance on Android
In RenderScript, we can either create custom renderscript and do bytes transformation as posted here or we can use pre-defined function script in android which is ScriptIntrinsicYuvToRGB.
On Flutter Side, We need to pack the CameraImage as Map as the channel binding will not understand the object.

On Android Side, The Biplanar YUV_420_888 bytes data has to be packed to NV21 YUV single byte array Before passing it to the intrinsic script.

This how packed bytes is converted to bitmap using ScriptIntrinsicYuvToRGB

Run the model with TFLite Interpreter
As in TensorFlow Lite Android Example, to run the modal we need two params,
- Input bitmap pixels as bytebuffer. Now we can use the converted bitmap and pack the pixels as bytebuffer for modal execution.
- Output float array where the model will write the output probabilities.

The output is four-dimensional array [1][13][13][425]. Here we take the first value and process the three-dimensional data based on yolo algorithm.
Based on the tensorflow yolo example TensorFlowYoloDetector.java , I did a minor update as per the tflite output array for the post-processing in postProcess method. Also handled overlaps suppression.
Here is the complete, YoloDetector.java and updated MainActivity.java
Draw Object Rects over Camera Preview
Using Stack widget, CameraPreview and CustomPaint widgets are positioned to draw rects of the detected object over the camera preview.

Using the key property, Size of the rendered preview is fetched using findRenderObject method and rect were scaled as per the ratio change.

Here is the object_detector.dart and updated main.dart.
With flutter run,
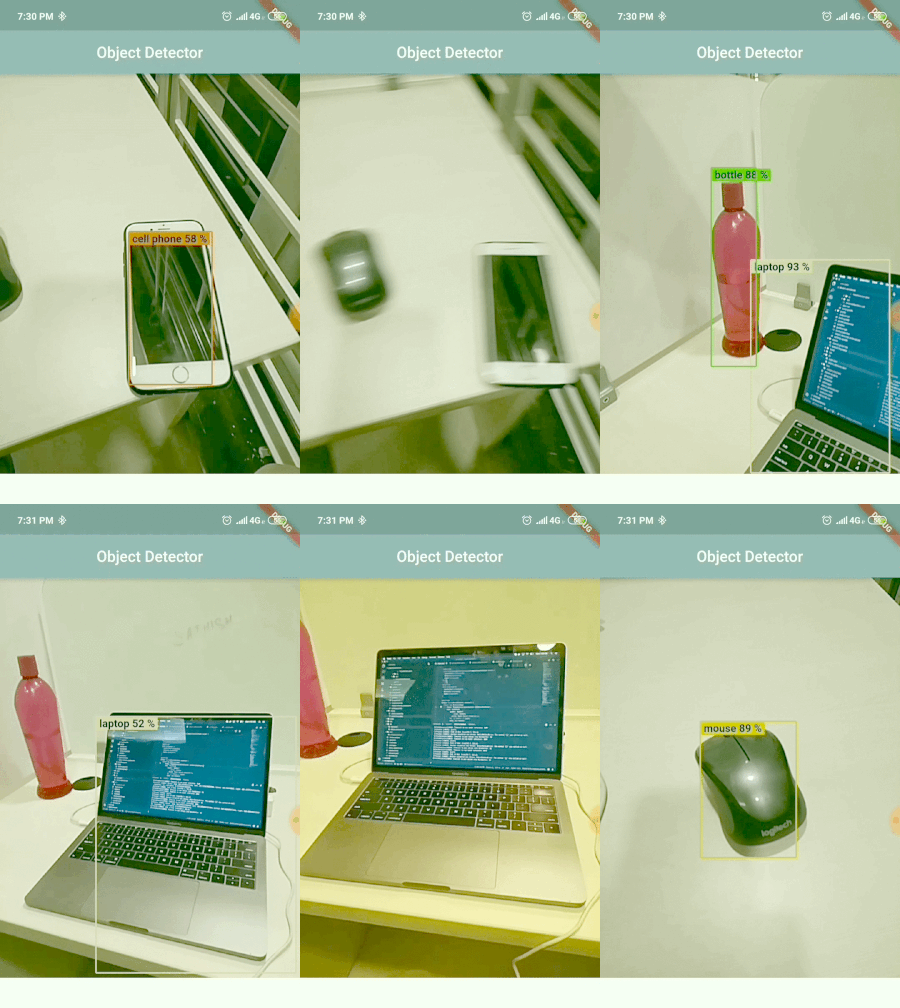
Followed by this article, we will cover the ios part using Swift with a custom trained model in the next article.
Francium Tech is a technology company laser focussed on delivering top quality software of scale at extreme speeds. Numbers and Size of the data don’t scare us. If you have any requirements or want a free health check of your systems or architecture, feel free to shoot an email to contact@francium.tech, we will get in touch with you!


